Create Project

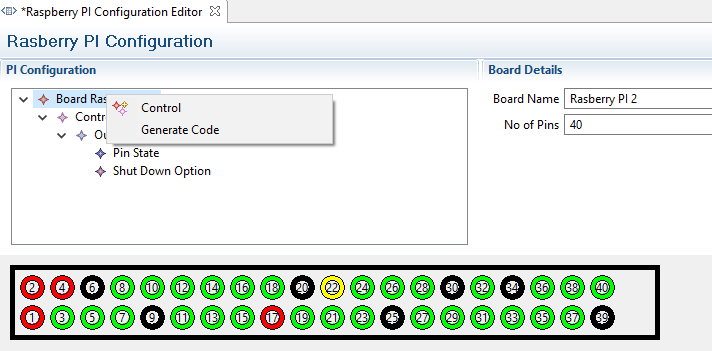
1.Choose File → New → PI4JProject from the Code RASPIDE menu bar

2. Enter the Project name, Chose Project type,Raspberry version and select empty PI4J project or PI4J project using template click on Finish

Create Controller Instance

1.Right click on Board raspberry pi select control

2. Select control enter control name and chose shutdown type

Pin Numbering

In the board 26 GPIO pins,8 Ground pin,2 Power pin with 3.3vcd ,2 Power pin with 5.5vcd and 2 I2C ID EEPROM pin

Provision Pins

1.Right click on control select one of the given list (Input pin configuration,Output pin configuration,Multi pin configuration)

2.Enter the detail in Pin configuration page deatil as your requirement and select a PIN

3.similarly you can do for Output pin configuration and Multi pin configuration

Control Pin State

1.Right click on Output pin configuration select one of the given list(PIN state,Shutdown option)

Pin State

1.Select Pin State and enter Delay time

Shutdown

1.Select Unexport and PIN State as your requirement

Read Pin State

1.Right click on input pin configuration select one of the given list(Shutdown option,Set Trigger,Sync Trigger,Pulse Trigger)

Shutdown Option

1.Select Unexport and PIN State as your requirement

Set Trigger

1.Select Pin State and select outputPIN("name of output Pin configuration")

Sync Trigger

1. select outputPIN("name of output Pin configuration")

Pulse Trigger

1. Enter Delay time,Select Pin State andselect outputPIN("name of output Pin configuration")

Generate code

1.Right Click on Board raspberry pi and select generate code

2.Now Your code is generated

.